Make your own copper post caps!
A recent note from our customer who did this project 7 years ago! "I'm happy to see the copper caps photos still on your site. I did over 1,100 of them and they still look great after 7 years. I bought all the material from you and it worked so well. Thanks, Rusty B."
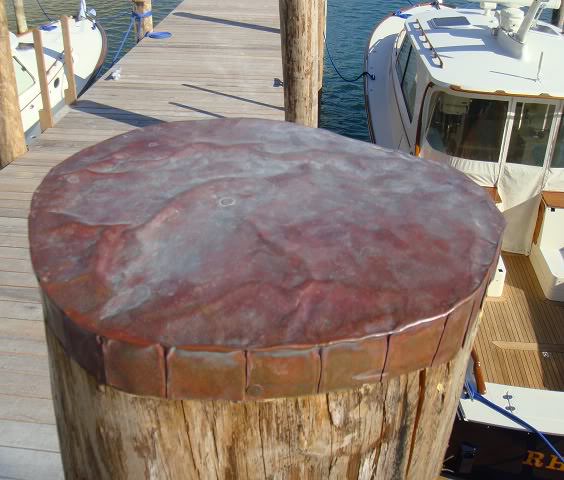
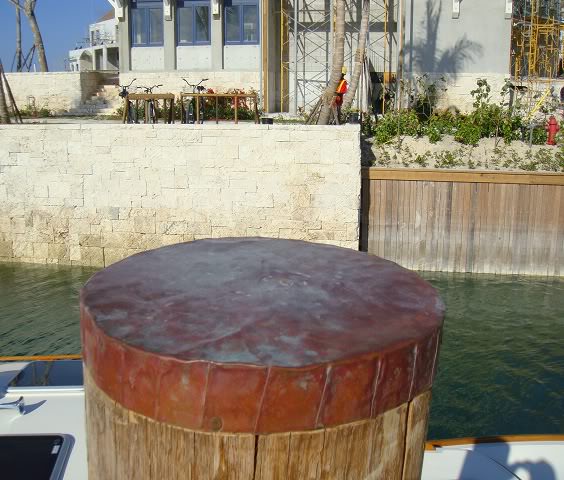
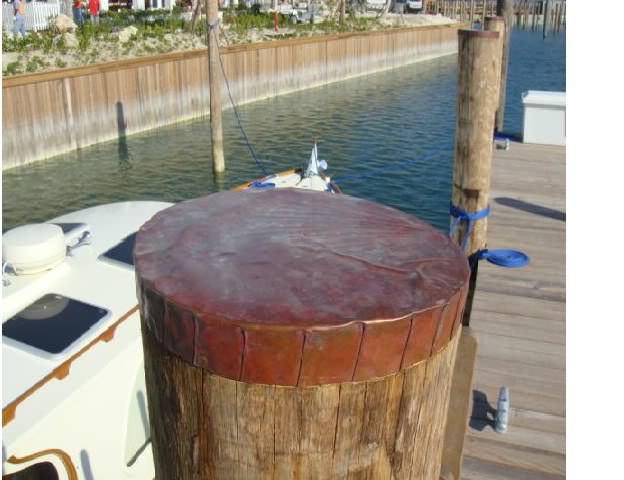
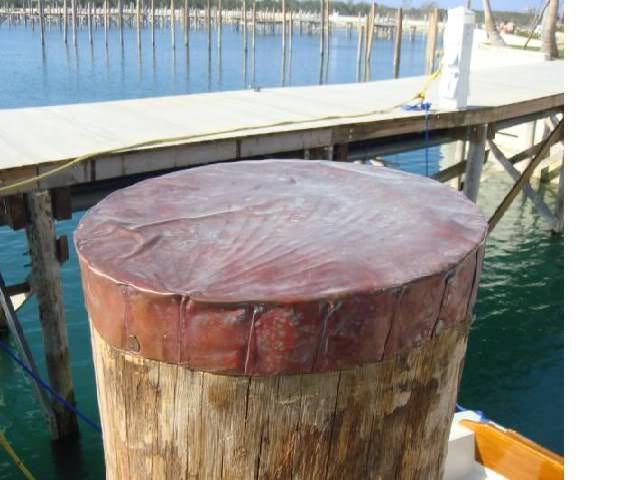
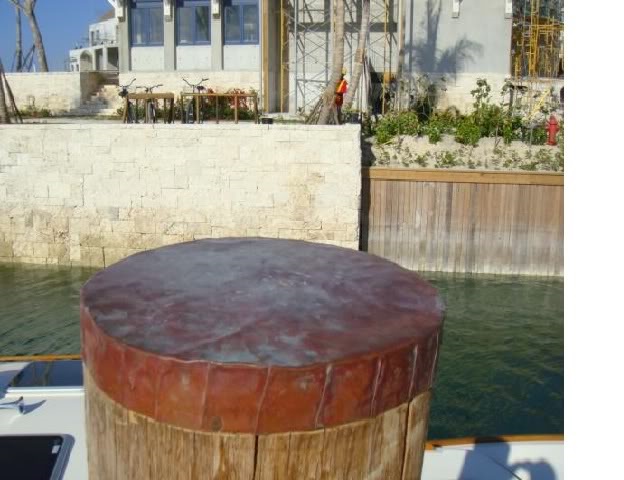
This is a popular treatment for many who live along the coast. Wood exposed to the elements may rot, but with a custom made copper cap- the pier post looks beautiful and is protected from the saltwater and harsh environmental conditions.
The same treatment can be modified to protect fence caps, decking, wooden garden structures, or any other wood that is exposed to the elements.
In creating copper post caps, people will use 10 MIL, 16 MIL, 22 Mil/16 Ounce copper sheet, with 10 MIL (30 gauge)being the most popular thickness. It is very pliable and easy to work with, but will hold up well over time. Still, some people prefer thicker material. To help decide which you might prefer, see our copper sheet thickness guide for a video description of the various thicknesses.
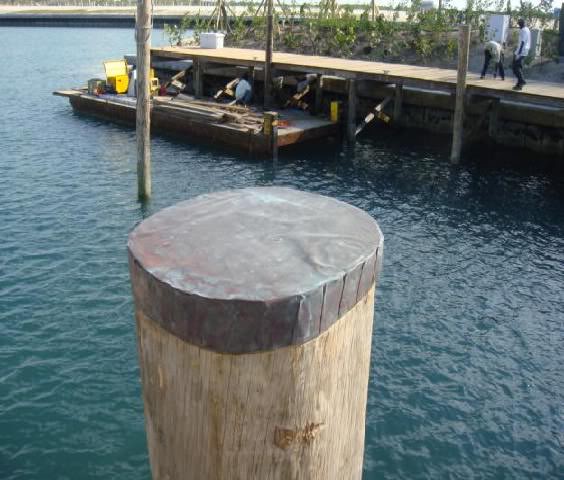
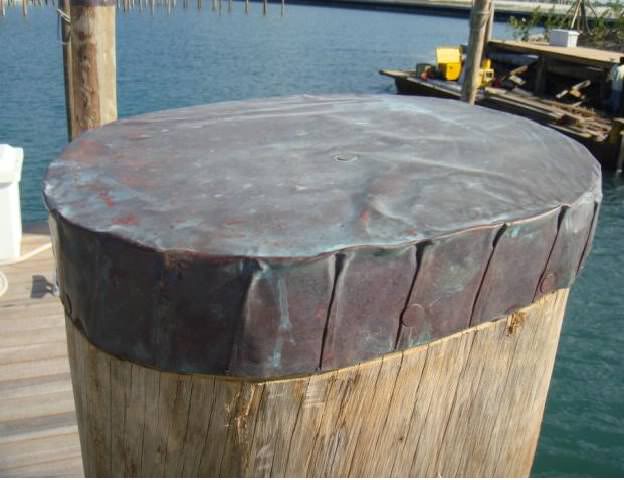
The method used here is very popular. Start with a piece of copper that is circular in shape and has a diameter that would add an extra 2" -3" all the way around. So for a 10" wide diameter piling, you would start with a piece of copper wide enough to produce a circle that is 14" - 16" wide. Once you have the 14" (or 16") circle, you would place it on top of the piling and center it. Then use a sharpie to trace the diameter of the piling from underneath or just press down on it enough to emboss the outline of the piling on the copper. Next, using tin snips, cut little slits into the circle about every 2", toward the center of the circle but not going into the 10" middle section that will be on the top of the piling. The result should be that these slits are 2" (or 3") long each and go all the way around the circle. Then you place the copper back on top of the piling and fold the little slits down, overlapping as you go, as you work around the cap until they all fold over the edge. This is done a little loosely at first so that you can take the cap back off and trim around the bottom to make it neat if you'd like. Next, put an adhesive on the top of the piling (some people use liquid nails) and place it back on the piling. Then you add copper nails around the edge, every 3 inches or so.
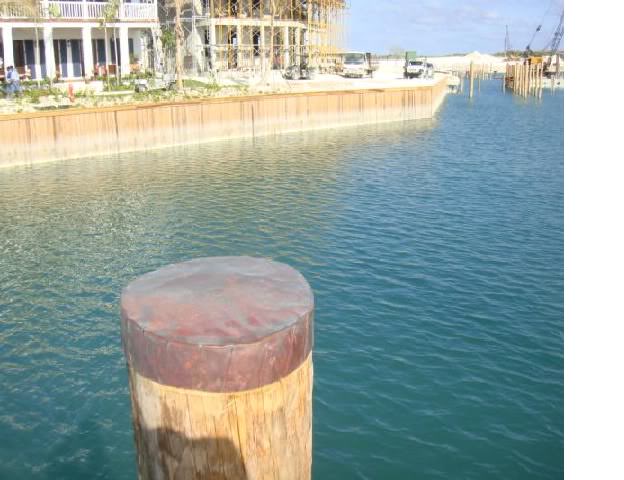
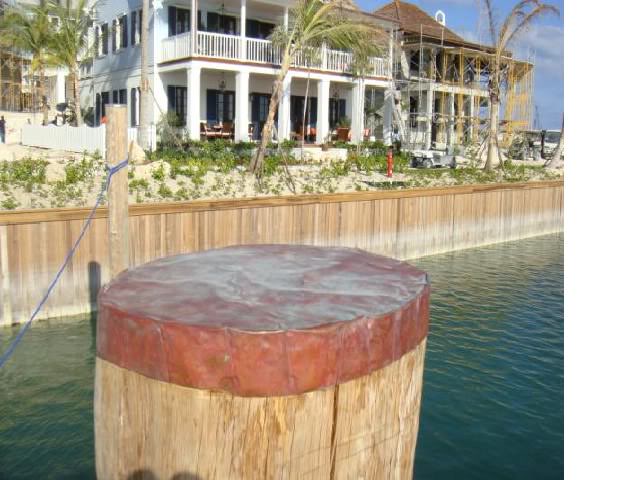
The pictures below are from a new marina at a resort in Abaco, Bahamas. They made over 1,100 copper piling caps for the piles using our 10 MIL copper sheet. In a saltwater environment, the unsealed copper quickly begins to develop the beautiful turquoise patina you see in the pictures below.
There are many ways to create and install copper post caps Check out this project using a slightly different method.