
Using Copper Sheeting in Arts and Crafts
Working with metals can be confusing. There are a lot of terms that are industry-specific. How does a mixed media artist or someone who creates art jewelry make sense of it all? Well, I have set out to do a little research to make it easier for you and me to understand.
A good place to start is the Thickness Guide on this website. This will give you answers to many basic questions about what to expect from each thickness of copper sheet. It will also give you examples of projects and crafts that you can create from the various thicknesses.
If you are just starting out and would like to experiment with the different gauges/mil copper sheet, then you might consider ordering a Sampler Pack or order some copper scrap pieces. I asked for this sample pack to be available since many of the pieces are large enough for assemblage or art jewelry pieces. It is a great way to start your copper explorations. You will find the copper scrap pieces under the Discounted Copper section: Copper Scrap pieces
The different sampler packs available through the website are located at: Copper Sampler Packs
Now I'd like to say a word about the terms mil and gauge. Mil stands for 1/1000 of an inch. Mil is commonly used to describe the thickness of sheet metal; however, there is also a gauge conversion. Gauge is used very often to describe the thickness of wire. The measurement in terms of the gauge is inversely proportionate to the thickness. That means that the higher the gauge number, the thinner the metal or wire will be, and the lower the gauge number, the thicker the metal or wire will be. Thus the 36 gauge copper sheets are thinner than the 30 gauge copper sheets. In using the term mil, however, the larger the number, the thicker the copper sheet will be and so 16 mil copper sheets are thicker than 8 mil copper sheets.
The thicknesses that Basic Copper carries are 1 Mil (copper foil), 1.4 Mil (copper foil), 3 Mil 5 Mil (36 gauge), 8 Mil(32 gauge), 10 Mil (30 gauge), 16 Mil (26 gauge), 22 Mil (24 gauge), 32 Mil (20 gauge), and 40 Mil (18 gauge). That is going from thinnest to thickest.
1 mil Copper Foil:
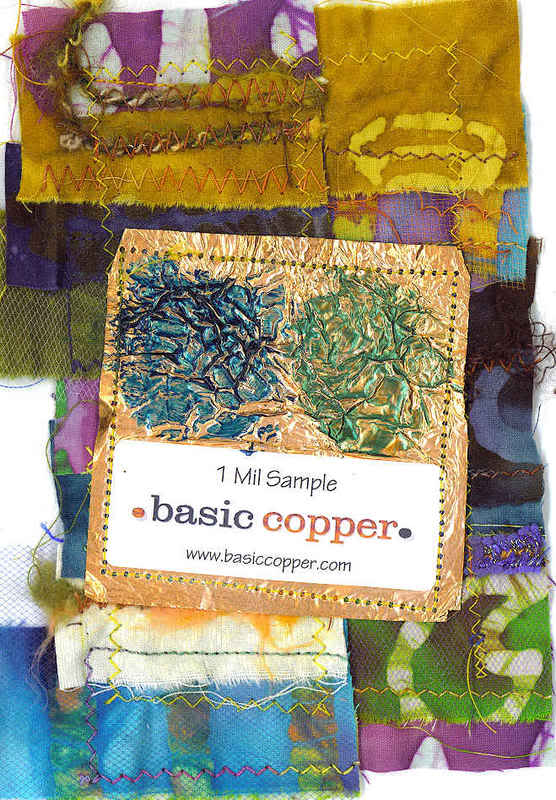
1 Mil is slightly thicker than the foil you use in your kitchen. I can think of so many uses for this foil! One of my favorite projects is to combine the copper foil with fabric. It adds an interesting texture and is very easy to work with.
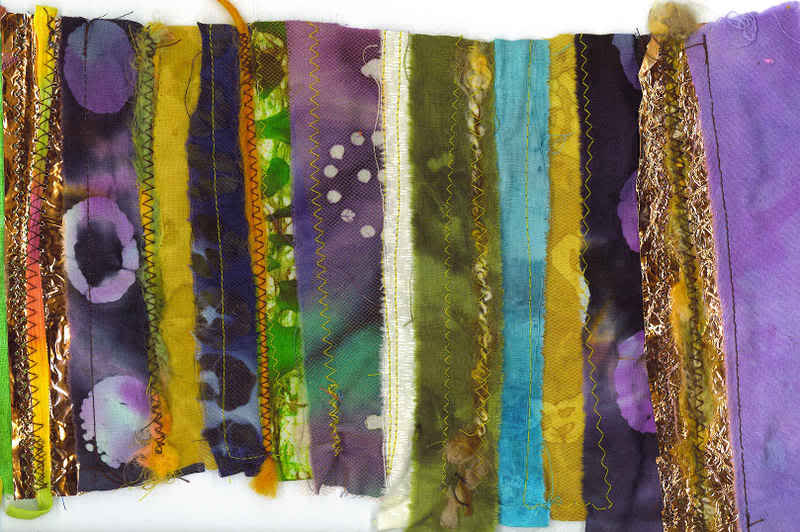
One project I have done is to use my sewing machine and sew it onto some scraps leftover from my heart journal swap. This thickness holds wrinkles well. When you wrinkle and then uncrumple this thickness, it does not tear apart like household foil. It would work great as part of a background for a scrapbook page, collage or painting. If you crumple it, you can use some acrylic paint or fluid acrylic on it. When it has dried, you can go over the peaks with a permanent ink stamp pad or use a sanding block to take the paint off the peaks. Wonderful contrast! If you want to paint on it as a smooth surface, you can do it with acrylic paint and fluid acrylics. It might smear a little since it is a smooth, nonporous surface. If you wipe down the surface with alcohol first or sand it a little, the surface will hold the paint better. You can also use Golden GAC 200 and the paint will adhere to the copper foil better. This foil will work well with many mixed media backgrounds. You can cut this thickness with a pair of scissors or even tear it with your hands. The 1 mil copper sheet will not hold its own shape without something behind it to reinforce it. I would not use this for metal embossing.
1.4 mil Copper Foil:

1.4 mil is slightly thicker than the 1 mil. You can also cut it with scissors and wrinkle it easily. You can use it in pretty much the same way as the 1 mil copper sheet, however, it is thicker and maybe a little sturdier. I would recommend this thickness for light textured backgrounds and for putting over objects that you might want to metallicize (and even distress). The 1 Mil or 1.4 Mil should only be used for die-cuts or punches that you want to be very thin and wispy. The images would be cleaner with the 5 mil or 8 mil.
5 mil/ 36 gauge Copper:
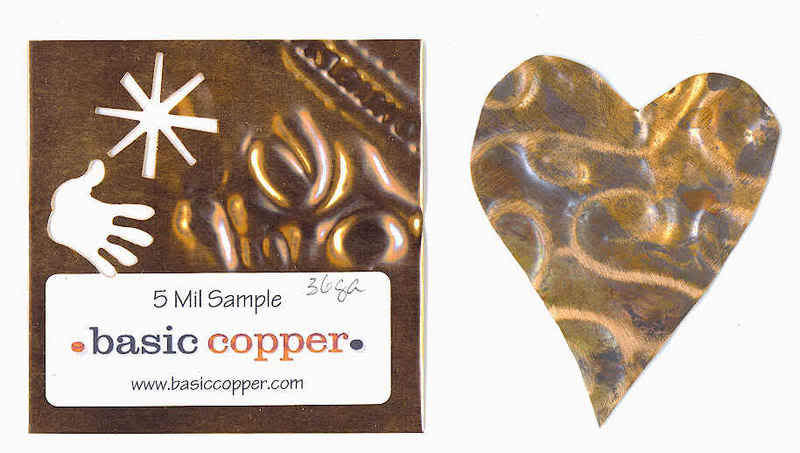
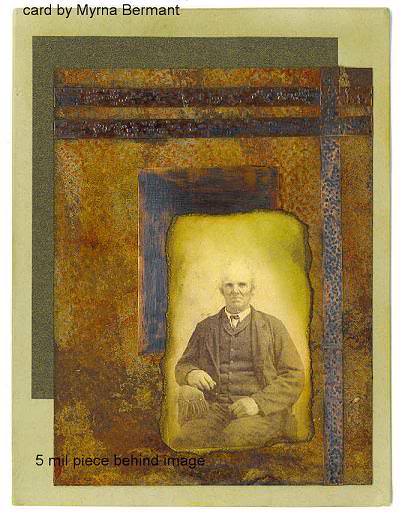
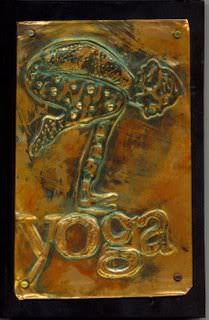
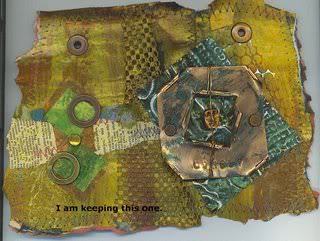
5 Mil copper is thick enough that it will hold shape pretty well. You cannot tear it with your hands, but it can be cut with scissors. It is very flexible and pliable. I would not use this thickness as art jewelry unless you have something solid backing it. It is perfect for die-cuts and punches and It is also a good choice for dry embossing or repousse. You would want to reinforce your dry embossing with something like light spackle or fill in large areas with polymer clay so that you do not lose the image over time. One approach I like to use is to paint the sheet metal first, let it dry, and then emboss. After that, I sand the peaks which produce a great contrast between the copper and the paint. I would also use this weight for focal image frames, as contrast behind my focal image, and for collage. Myrna Bermant sent me an excellent example of this with her card:
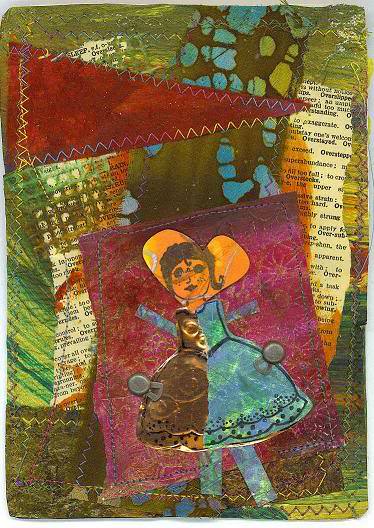
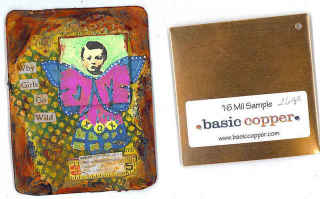
And here is a journal card that I created:
8 Mil/ 32 gauge Copper:

8 Mil is the next thickest copper sheet. It is still quite pliable but to punch it requires quite a bit of pressure. You can tell from the marks on the sample that I had a hard time trying to get a punch to work with this thickness. (I had to step on it to get the punch to work.) You can still use a pair of scissors to cut it. I would use this weight for art jewelry but would use two layers cold connected together or have something solid in the back of it.
It is also a good coiling thickness. You could use round nosed pliers and create some great coils or rolled beads with this weight. You could stamp it, paint it, or put some transfers on it first. This thickness would also work in a lightweight capacity in assemblages. You can also use this thickness for dry embossing but your images or designs would have to be more broad as it would be more difficult to get fine detail with this thickness. Puffing out the copper would work well with this thickness.
10 Mil/ 30 gauge Copper:

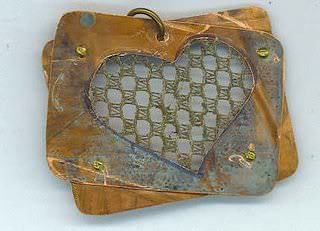
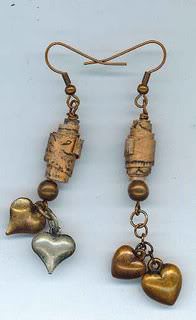
10 Mil is the thickness that I use the most often because of its versatility. It is pliable, easy to work with and yet thick enough to hold shape. I use it in assemblages, mixed media art, and in certain art jewelry pieces. Here are photos of some of my work using 10 mil copper sheets:
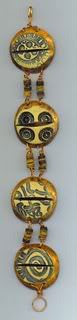
I usually use a pair of snips to cut 10 mil. You can also use a pair of scissors or a utility knife, but the edges are very sharp so you will want to be careful. I have created metal ATCs and metal collage cards with 10 mil copper sheet. It can be texturized with a variety of objects, such as a small hammer, or polished for a smoother finish. (By the way, a Crop-a-dile will easily punch a hole in your copper sheet up to the 16 mil thickness. You can see the Crop-a-dile hole in the 10 mil and 16 mil sample photos).
16 Mil/ 26 Gauge Copper:
16 Mil This is a good thickness for sculptures, assemblages, and art jewelry. I have created quite a few pieces of art jewelry with 16 mil. I have also created some art cards using this thickness. It is not so thick that I can't bend or form it, but it is rigid enough that it will hold whatever shape I create out of it. It is a good choice when you want to sacrifice pliability and ease of cutting for a more rigid final result that will hold shape very well without the need for a backer. I would not try to emboss with either the 10 mil or 16 mil copper sheets, however, both respond to texturizing very well. You can hit it with a variety of objects to create your own unique texture. 16 Mil copper definitely needs to be cut with a pair of snips or something similar.
As with any sheet metal, the edges can be extremely sharp. Be careful when cutting or working with it. Whenever I create pieces that have sharp corners, I usually use an old pair of scissors (so I don't worry about ruining them) and trim the corners so that they are slightly rounded. You can use your Dremel, sandpaper, or sanding block to sand the edges so that it is not sharp or rough to the touch.
It can be a daunting challenge to start to learn a new craft, so the most important thing is to have fun and don't be afraid to experiment. You will certainly be rewarded for your efforts by the countless objects you can create with this beautiful and unique metal.
Belinda Spiwak is an artist working mainly in fabric, collage, metal, and art jewelry. Visit her blog Crazy Art Girl's Musings to see more of her work.